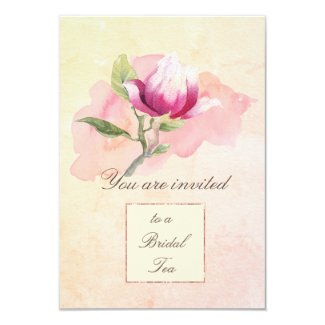
If you need to make a professional looking graphic for your headers or banners it is no secret that Picmonkey and Canva are free, easy, and accessible.
However, maybe you didn’t know about that, yet.
It is easy to sign up for free access to most of the features and use the online editor. However I use the premium, for the extra features. Want to access those? Use my handy affiliate link for Picmonkey, and support me while you do yourself a favor and gain some really useful apps for graphics.
Canva is very clear that their graphics are for personal use only. So nothing made on their site should be sold, although I am sure that you can make personal headers for your store or collections on this site.
Picmonkey has no dire warnings, so I am not sure about the use of your graphics, although they will be perfectly fine for anything personal, as well. Personal use is posting on your social media, blogs, etc. as well as making products for yourself, like cards you want to send.
Commercial would include POD products like those sold on Zazzle, etc.
Right now the only things I am recommending these sites for is the personal usage. Making Facebook headers, headers for your store, or profile pics. Collection and category graphics which can all be branded with your particular style.
I just finished giving my artist daughter some advice about Zazzle. As it kept building into almost a “mini-course”, I thought maybe it would be a good idea to write some of that advice down in one place.
Start Here to Learn Success Tips For Zazzle
So much has changed at Zazzle that it is time to make some additions to this page. Thankfully just about everything written previously is still helpful. June 16,2024 Presently, one of the most important things to change is how important self marketing has become. Not just utilizing social media, but making graphics for your products (called “cover photos”) and collections. Collections themselves have risen in importance when it comes to gaining visibility for your designed products.
Canva app is really helpful in doing this, but it is no longer free to use. Youtube tutorials will really help you learn many Zazzle success tips.
For personalizations such as customer’s photos, learn to use the masking feature. More about that feature on the Community forum, here. You may have to be signed in to view the forum posts. Start with this PostThis post has been UPDATED on Jan. 12, 2018.Zazzle has much improved their setup. The design tools are quite robust and I rarely have any troubles with “hang-ups” or freezing, now. The auto-save features on the site are reliable. The questions started with… What can I do about my created product “hanging up” when I try to post it for sale? To this, and other difficulties like it, the answer is save your design and write down the title, description, and tags in a text file to copy-paste. Once saved, the design will show up in your “saved file” and you can usually proceed without a problem. The short answer is that sometimes the javascripts get jammed. It might be your browser, Zazzle’s site, or a slow internet connection. Who knows? Just save wherever the hangup is, and then go from there.
This happens to me most often when I am trying to post for sale. That is why I use a text file to keep from losing the description and tags. It is useful as a temporary file for making more products with that same design. Copy and paste the description and tags saves time and typing, while tweaking them for individuality makes them a bit unique.
Designer Editor Improvements
There are a huge number of improvements to the Design Editor.
Select images and text in a design you’ve made, look for the “edit” dropdown, and chose “copy”; then paste the creation onto another surface, even a whole new product design.
“Filters” can change colors of an image into several types of styles; “Patterns” create a number of repeat styles.
Many fonts are available, once text is typed the spacing can be tweaked via the “AV” dropdown. A few text warps are available: arc, inverted arc, vertical.
Infinite color choices for background and for text.
It is now possible to mask photos/images
The crop and selection functions are quite robust.
I used a filter setting to make the background look more like I wanted. On the reverse side of the design I used the arc and the character spacing tweaks for some of the text.
Making Multiple Products with a Design
You can still “Quick Create” (not sure in 2024), but it is no longer recommended, and takes a long time to “post”. With the copy and paste powers of whole designs including their text and settings, it is easy to make multiple products with your favorite creation.
An update is the ability to transfer a design to new products. Just be sure that you modify it if needed to properly fit the product and its dimensions.
Keep Track of Colors via HexFiles
The next tip is to keep a file of hex files for colors you want to use. Either because they are trending or you want to repeat use of those hues.
Keeping track of hex file codesWhat is a hex code?Number and letter codes used for specific colors for certain designs along with description and tag words so that when making more products from that design these are accessible. Name you text file “Zazzlecode” or something similar.
My Best Choices for Hex Color Codes
The Zazzle color chooser itself gives you the hex codes for the color you have chosen- write it down to use again ( that source file, you are keeping).
Want to know the trendiest Pantone colors? This w3schools site is a great resource.
Or go directly to the Pantone site, but to the insider area where you type in a color name and the info (including hex number) comes up on its own page. Pantone Color Finder
SEO Is Important for Zazzle Sales
The next bit of advice is how important it is to use some basic SEO, since an artist has to do her own marketing. Use descriptive relevant terms when titling both the design and product, when writing the descriptions, and especially when choosing tag words and phrases.
If you don’t know very much about SEO, there are scads of articles and sites online which explain this to bloggers. Artists can use that same information when working to get Google to find their products, too. Here are the Zazzle success tips to help with that.
Zazzle prefers that you use around 10 important keywords, although you can use more.
Describe your design in terms you think people will search for.
Don’t inflate with irrelevant terms, there is a No-Spam policy in place.
Use places for text that can help your SEO, like descriptions and titles for images, as well as design descriptions and tags. Collections also have tags and descriptions.
Right up there with SEO is making your own product images. Information on important topics for creating and selling in their official handbook. The link above is useful to look at, but outdated, as Zazzle is constantly changing. Check out the PDF, here, as well as guides on the site (Wedding guides, trend guides, etc.
Collections
These are ways to curate your designs, introducing less popular ones, and help to organize your site. They are useful for social media sharing, so learn how to make them (quite easy), then display in your store. It’s been recommended to have your collections near the top.
The entire concept and creation of Collections has re-vamped! To gain greater insights and guidance into this vital part of a designers toolbox, view this video:
This is a fantastic way to share more of your designs to potential customers. Potential customers get to see more of your work ; much easier than trying to spend time navigating your stores (which is awkward and time consuming for most people).
The New Title
Duplicates are a problem in SEO results, so while it used to be okay to have multiple products that use a design titled and described all the same, this is now a problem. Customize the written labels and descriptions for each product.
Zazzle Success Tips forViews
Products views are important. Even your own view of one of your designed products counts, but if you have created something that no one views over a certain length of time, it gets hidden from the general marketplace.
So include your creations in the collections, share them, and go to their pages if necessary, to increase the possibility of sales.
That sums up the latest of gleaned tips for gaining a foothold in Zazzle success. If you have tips add them, please.
Now there are “collections, products that you can curate any way you wish. These are shareable ways to make your store more attractive and help customers find related designs.
Share with your friends and followers on Twitter, Facebook, and your own website.
Group product designs by theme or occasion
Relate by product type (iphone cases, postcards, etc.), event ( birthday, retirement, et al), theme (vintage, cats, fractals), or occasion (Christmas, Mother’s Day, 4th of July).
Don’t create huge Collections. I made this mistake at first. Since then I have pared down those very large unrelated ones to help me better serve customers in finding what they want.
Examples of Two Zazzle Collections
Featuring two of the brand new style of Collection that Zazzle has rolled out. These are from my store for all things Baby & Kid related. I love the cute designs that bring out the child in you and are aimed to bring joyful celebration into their lives.
Each profile has a “Collection” button in the navigation bar. Click on that and there is an intuitive box with the plus sign that you click to make your group, which you name and tag.
Make a banner which is 1140 x 315 pixels. Upload to the banner space in the collection (cropped in the same manner that Facebook banners are uploaded and changed).
Next: Go to a product that you wish to add. Find the “add to” button.
addto button
Click on the down arrow and it will open up a list of your collections. Simply check the box next to the one you wish to add the product to.
Go to your collection after you have added 3 to 10 items and share it with all your friends and followers.
Zazzle Success Tip 2: Promote Yourself
It is really important to do your own marketing when you have a Zazzle store now. Learn how to tag your designs and products without spamming (Zazzle has a strict no spam policy).
Share and encourage your friends to do so. If you have products that you think are poorly done (usually in retrospect), hide them.
If you have some that haven’t gotten any views, give them a few yourself (just by going to the page) to keep that product in the Marketplace until the public discovers it.
Remember to attach your associate number to the things you share, Â of your own design or others in case it makes a referral sale.
Referrals are Important for Zazzle Success
Share, but don’t overshare referral links on social media.
Consider using a free blog to show off your designs and those of others. Include pertinent designs in your blogposts.
While it is possible to make income from this form of sharing, I have made very little from it. For me, referral traffic is more important to create some buzz about the product items in my stores.
Zazzle Success Tip 3: Helpful Sizes to Know For Your Store
It can be a nuisance to try to guess which size graphics to make for the various parts of this POD. Banner sizes are a necessary addition to Zazzle success tips.
I seem to always have to look up some of the other graphics dimensions, and to save time collected a few here:
Make sure the “dpi” or resolution of your graphics are high enough. I think 300-350 dpi is a good range. Lesser is acceptable, but not the 72 that is common for most web pictures.
DPI Is Important
High enough resolution is important for printing. “Dots Per Inch” makes a difference in sharpness of the image.
1. Go to create your chosen product (but don’t add an image) 2. Change to ‘Design’ view and ensure the guides are switched on 3. Click the ‘Zoom’ button and take your screenshot 4. Trim the image down to the red rectangle (the bleed area), I also make the white part transparent 5. Now the image needs to be enlarged to the size you will be using for the product – in the case of the iPad Mini you could base the measurements on measurements of the device itself (given above) – I tend to make my graphics a little larger than necessary to allow for effectively ‘zooming in’ when making the product (or to give a customer the option of doing the ‘zooming’)
Of course, you can always use your Instagram pictures or simply upload a large enough design to give a good print for the product. Not exact, but this can work.
Zazzle is set up to share profits, through royalties and referrals with their members.
Whether you can earn income is a mixed bag of answers. Many people do earn well, and it must be stated that they probably work very hard at it.
I have read many statements in the forums and elsewhere that provide insights into their process. Most devote several hours each day to making their stores successful.
It is not easy money, but it can be part of a business.
I have done better when I invested more time into improving my store with keywords, designing products, and paying attention to examples from the top trending products.
I make less now than a couple years ago, which may be due to a number of changes that the site has made. My own intention is to work on my brand, improve my techniques and designs, and make more products.
That is also the advice I give you.
It remains to be seen whether the referrals will produce any income, as of now, it doesn’t. (For me, I can’t speak for everyone). It could be that there is too much competition for the casual presentation of products.
Collections
A recent way of showcasing products is the set of collections. Curated by you, these are a way to promote either your own or fellow Zazzler’s work. To complete your profile you make a certain number of collections which are then shown on the stores you own. You can choose which stores a collection appears within.
They work very much like a Pinterest board, just on a smaller scale.
Here are the tips I have gathered and learned through my own experience.
It is a numbers game- make lots and lots of designs and products for Zazzle income results.
Pay close attention to keywords and learning about SEO for Zazzle as well as for your blog.
Use your social media to gain interest in your stores and designs.
Investigate the idea of designing around a niche. The fact that you can have multiple (free) stores encourages and facilitates this.
The forums are very informative, visit there for the new products, helpful tips, and troubleshooting.
Set up a blog for showcasing your work. Write posts about the designs or the products. Or related topics such as baby shower parties, wedding invitation tips, birthday party themes, etc.
I am beginning to try to use more posts to showcase great products and designs… a type of “curation post”. I will report on whether this has any effect on referral income for me, and let you know what the practices are that result in income from Zazzle.
I tried to sign up as an affiliate for them, but that didn’t work out. The affiliate process from the site itself is what I must use.
If money were the only reason I write online, in my blogs and communities, then pennies is the payout and I wouldn’t consider it worth the time. But if writing is more than earning a paycheck, then my success has made me wealthy.
It all depends on how we value our time, effort, and results.
I’ve been attempting to build an online business, and part of a business is producing something, while the other part is its ability to provide income.
While I started out writing and creating websites just for the excitement of it (and watching the site statistics!), the reward of feedback in reader commentary became an important part of the reason to write. At that time it was reward enough for me.
As the internet became bigger it became important to put some of my writing into its own hosted domain. That cost money. Thus was born my initial attempts at monetization with much trepidation. In fact, I was so timid about adding Google ads and Amazon associate links that I made almost zero every month. And only a penny or two usually on other months. That went on a long time, long enough that I wondered whether online earnings might be an Urban Legend.
Caution
While taking advice from this post, use it mainly for information purpose only. The “content farm” writing sites have changed so much in recent times that this information is outdated.
I finally earned something
After I did start getting some small results, it just seemed that the boat had passed me by, and I did miss out on the early days when some savvy entrepreneurs were turning their websites into businesses. Today, though, I see that with lots of hard work, it is possible to build your income with writing online.
I’m not successful enough to parlay expertise into training and tutorials, but I can share how some endeavors are working for me.
My family also uses Amazon Prime often, which saves us money on shipping and more.
Please support my site by using my links, thank you. This Page may contain affiliate links. “As an Amazon Associate I earn from qualifying purchases”