Now there are “collections, products that you can curate any way you wish. These are shareable ways to make your store more attractive and help customers find related designs.
Share with your friends and followers on Twitter, Facebook, and your own website.
Group product designs by theme or occasion
Relate by product type (iphone cases, postcards, etc.), event ( birthday, retirement, et al), theme (vintage, cats, fractals), or occasion (Christmas, Mother’s Day, 4th of July).
Don’t create huge Collections. I made this mistake at first. Since then I have pared down those very large unrelated ones to help me better serve customers in finding what they want.
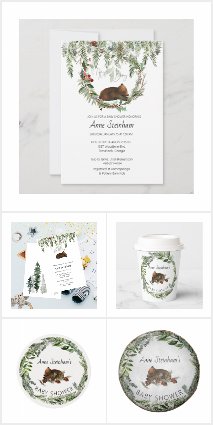
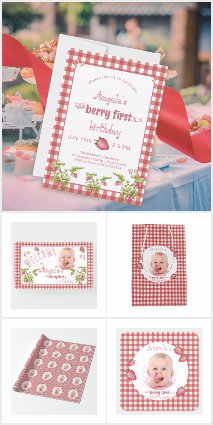
Examples of Two Zazzle Collections
Featuring two of the brand new style of Collection that Zazzle has rolled out. These are from my store for all things Baby & Kid related. I love the cute designs that bring out the child in you and are aimed to bring joyful celebration into their lives.
Each profile has a “Collection” button in the navigation bar. Click on that and there is an intuitive box with the plus sign that you click to make your group, which you name and tag.
Make a banner which is 1140 x 315 pixels. Upload to the banner space in the collection (cropped in the same manner that Facebook banners are uploaded and changed).
Next: Go to a product that you wish to add. Find the “add to” button.
addto button
Click on the down arrow and it will open up a list of your collections. Simply check the box next to the one you wish to add the product to.
Go to your collection after you have added 3 to 10 items and share it with all your friends and followers.
Zazzle Success Tip 2: Promote Yourself
It is really important to do your own marketing when you have a Zazzle store now. Learn how to tag your designs and products without spamming (Zazzle has a strict no spam policy).
Share and encourage your friends to do so. If you have products that you think are poorly done (usually in retrospect), hide them.
If you have some that haven’t gotten any views, give them a few yourself (just by going to the page) to keep that product in the Marketplace until the public discovers it.
Remember to attach your associate number to the things you share, Â of your own design or others in case it makes a referral sale.
Referrals are Important for Zazzle Success
Share, but don’t overshare referral links on social media.
Consider using a free blog to show off your designs and those of others. Include pertinent designs in your blogposts.
While it is possible to make income from this form of sharing, I have made very little from it. For me, referral traffic is more important to create some buzz about the product items in my stores.
Zazzle Success Tip 3: Helpful Sizes to Know For Your Store
It can be a nuisance to try to guess which size graphics to make for the various parts of this POD. Banner sizes are a necessary addition to Zazzle success tips.
I seem to always have to look up some of the other graphics dimensions, and to save time collected a few here:
Make sure the “dpi” or resolution of your graphics are high enough. I think 300-350 dpi is a good range. Lesser is acceptable, but not the 72 that is common for most web pictures.
DPI Is Important
High enough resolution is important for printing. “Dots Per Inch” makes a difference in sharpness of the image.
1. Go to create your chosen product (but don’t add an image) 2. Change to ‘Design’ view and ensure the guides are switched on 3. Click the ‘Zoom’ button and take your screenshot 4. Trim the image down to the red rectangle (the bleed area), I also make the white part transparent 5. Now the image needs to be enlarged to the size you will be using for the product – in the case of the iPad Mini you could base the measurements on measurements of the device itself (given above) – I tend to make my graphics a little larger than necessary to allow for effectively ‘zooming in’ when making the product (or to give a customer the option of doing the ‘zooming’)
Of course, you can always use your Instagram pictures or simply upload a large enough design to give a good print for the product. Not exact, but this can work.
Produced a few more of Elaine’s images into Zazzle products today. She is slowly seeing a few sales.
Her work has a Facebook page, but not many know of it. Any likes are appreciated.
Go here for Elaine’s Facebook Page
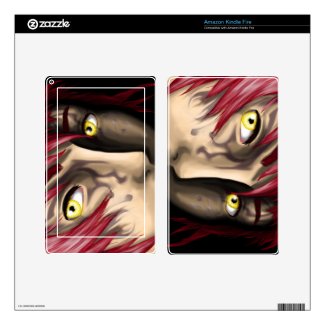
This anime character has two modes: regular boy and emo mode. That is what I call it anyway. Her friends on Facebook rave over her work, but no one has bought anything yet. Most orders for her stuff has come from Europe. My stores have been very quiet, also, although I put up many new designs and products. Perhaps it will pick up later this year. I hope so. I think I have not quite worked out what people like about my way of making Zazzle designs. So far it was my beach photo products that sold the best. And a few of the Hungarian folk style things.
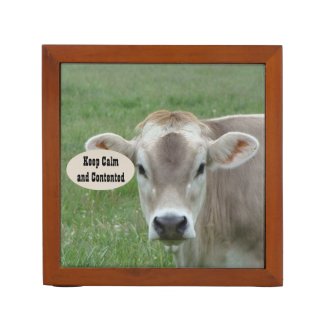
People have come to like my cows, too.
I decided that Ilona’s Garden should be more about natural landscapes, plants and flowers, while vintage illustrations, designs, and art ought to be in its own store. So far, no buyers, or traffic yet.
Over the years plenty has changed at Zazzle. The sizes needed for customizing the stores, the store profile banner and the member profile image are just two to know.
To complete the requirements for 100% profile and store completion includes making “media” as well. I had trouble getting the sizes large enough.
The Store Banner
As of now, in the Forum, the advice is to make the store banner the right size. Here is the official advice:
The important thing to remember is that the image should have an aspect ratio of 76:21
That is 3.8x 1.05 inches.
Official word on this is: “The main banner to your store should be at least 2280 pixels wide by 380 pixels in height (e.g. 2280 x 380).
Your banner should give some ‘texture’ as to what your store is. A pattern or repeating image works well, as does a photo of objects that you don’t have to see in their entirety to know what they are. The reason for this is because your banner scales depending on the device it’s viewed on.”
Member Profile Pic
Make it square and make it 512 x 512 pixels. ” Logo You should have a logo that fits into a square shape and is no less than 512 x 512 pixels.” Your member page has a profile pic, and your store has a logo. The recommendation presently is to use your personal photo for the member profile instead of a logo or avatar. This helps a customer to connect to you as a person.
Your store logo ought to reflect the brand (look) you wish to incorporate into your products and store.
Category Pics
Without images, the categories will not show up. Make your store category pics are 640 pixels square, minimum.
A Word about Images
“Resolution” is very important in making images for both web and print. Generally, as long as the image size is right, the resolution for web can be 72 dpi. When making images for printed products, minimum of 300 dpi is used.
There are also “media pictures” now. For the longest time I just didn’t get what they’re all about , but this is the word from on high on those:
Media Images
“Any photography or images you add to your ‘All Media’ section should be at least 1080 x 1440 pixels.
The image sizes we give above are the minimum of what you need to upload. If you want the best resolution possible, double the pixel size suggested above.”
Many designers are taking photos of products they ordered. I used an online Pinterest oriented generator to make an automatic collage that uses collections to make media worthy graphics.
That generator is no longer online 🙁
Advice for Zazzle Media
However, Zazzle now offers download of your design and the mockup images they make for products. These can be downloaded and worked into backgrounds or ready made mockup images for your media of all types. I was using Photoshop, but now find that Canva Pro makes it much, much easier.
If you are starting out and on a budget, try using Gimp or another inexpensive or free graphics program to make the desired images.
update 2015 2023
I promised I would update this page.
Due to big changes in the format that Zazzle uses, much of the old information on customizing your store has changed and is outdated. In fact, the way you set your store and sell on Zazzle has changed in fundamental ways.
What are the Biggest Changes?
Marketing. Designers on the platform must implement all sorts of marketing efforts. They are encouraged to do the usual online social media, but on the site itself each product is to have its own media.
Canva and Other Apps Help
In creating the necessary media for the products and your store, you can make them with any graphics program from free to the pricey Adobe Photoshop. But the easiest solution for most Designers is to have a subscription to an online app like Canva.
There are many Youtube tutorials on how to use these programs.
Going Advice Changes
The going advice on how to succeed with P.O.D. sites undergoes much change, as well. Branding your store with certain colors and style has been recommended.
Collection Cover images were introduced. These need to be a minimum of 324 x 324 but are displayed at only 272 x 272. (If instead of adding a cover image you just let it show the first item in the collection, it displays at 252 x 252.) I use jpeg files that are 2295px square.
Collection banners are 1140 x 315. The banners are inside the collection page, and look just like the store banner on the screen.
Collections themselves have changed in a huge way. Thankfully, tools to help make the most of them are baked right into their creation. You can create a banner especially for the collection or use a representive one that is used in the product design. Use whatever gives the customer a “feel” for the group of products displayed.
There are topics like wedding, bridal and baby showers, and more. Displays from cross-sell (everything for a baby shower theme, for example) to diverse designs that are tied together with intent (like kids birthday invitations). Experiment with this important part of today’s Zazzle stores.
Absolutely Brand New
Products can have a “cover image”. These show up in the Zazzle Marketplace to highlight your product. I use a jpeg file that is 2295px square.
For everything you need to know about product cover images and “best practice” guide, check out the offical, and clear, Cover Photo Guide 2022
Zazzle has optimized for mobile. I think this is smart, since that is the direction the web is taking.
It has also simplified the entire process of installing a header. Like Facebook, you simply upload a large enough photo or graphic for the background. The store profile picture (logo) is to the left, and a (member) profile pic is in the center on your profile page.
Each category must have a graphic to appear, a product picture or one of your product image could be used.
Topics for Future Tips
The entire process of referrals seems to be shrouded in mystery. I am investigating that for future posts.
Helpful branding advice for setting up your store is another topic to further explore.
Continue to read past entries… which might still work
Read this portion more for curiosity sake.
Click here to learn more
Zazzle completely changed its look and how each of the stores look, as well. I have been having a hard time finding the information needed to customize my store, so I thought I would collate some of the necessary info in a Webhelp post- which is “Web help for baby geeks”.
First, sizes.
The size needed for the Store Icon is 200 X 200 pixels.
The size needed for the Header is 2360 X 400 pixels.
Featured Categories: 648 x 648 pixels, although I downloaded a template gif that measures 500 X 500 pixels.
Zazzle calls the header a “Mantle”.
Troubleshooting
This page from Zazzle lists some of the issues; in case you are struggling with something, it is good to know when it is them and not something you are doing wrong.
New Site Issues List
Did you wonder what happened to your products and how to figure out “groupings”? There was an illustrated post in the forums that clarified this for many of us:
My family also uses Amazon Prime often, which saves us money on shipping and more.
Please support my site by using my links, thank you. This Page may contain affiliate links. “As an Amazon Associate I earn from qualifying purchases”


 addto button